
So, the season’s on the change; the evenings are getting that tiny bit chillier and I may have been using my hot water bottle already! If you’re an Autumn loving crocheter and you’re looking for some quick and easy crochet makes, I have 3 good ‘uns just for you.
These all use yarn scraps, mainly King Cole DK and Chunky yarn…but feel free to use whatever you have!
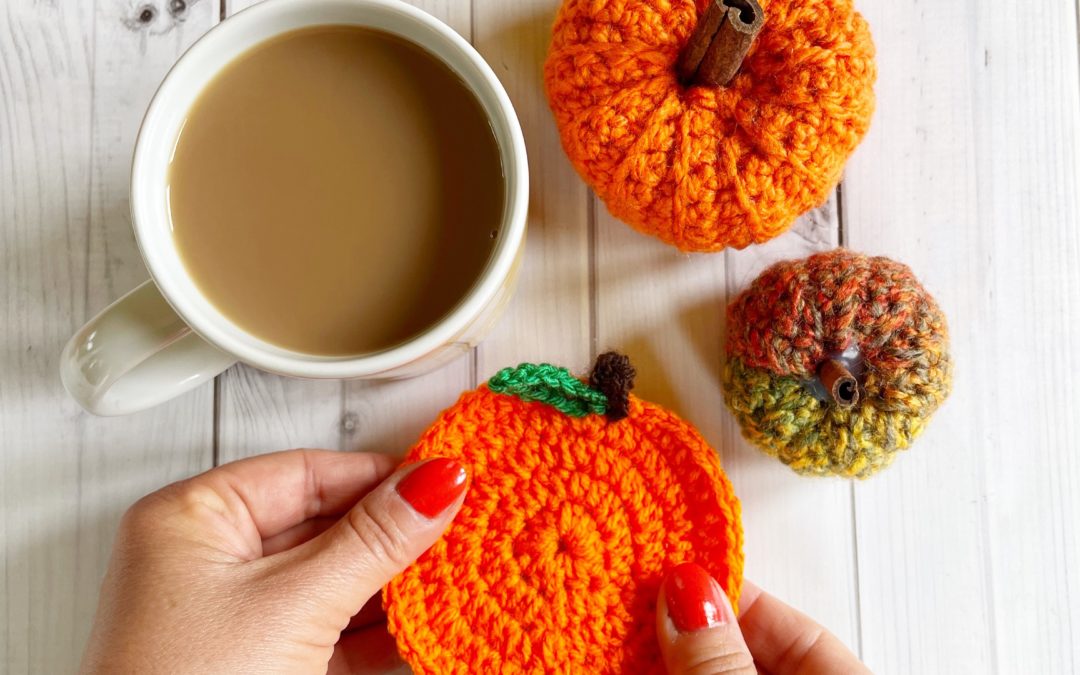
Crochet Pumpkin Coaster
You will need: 3.5mm hook, DK yarn scraps in orange, brown and green.
Start with a slip knot and ch 5. Join with a ss into the furthest ch from the hook to make a circle.
Ch 1, pop a stitch marker into the ch 1 and put 10 htr into the circle. Join to the stitch after the stitch marker with a ss.
Ch 1, pop a stitch marker into the ch 1 and put 2 htr in each stitch all the way around. Join to the stitch after the stitch marker with a ss.
Ch 1, pop a stitch marker into the ch 1. Put 2 htr into the first stitch and 1 htr in the next stitch. Repeat 2 htr, 1 htr all the way around. Join to the stitch after the stitch marker with a ss.
Ch 1, pop a stitch marker into the ch 1. Put 2 htr in the first stitch, 1 htr into the next stitch and 1 htr in the next. Repeat 2 htr, 1 htr 1 htr all the way around.
Join to the stitch after the stitch marker with a ss.
Ch 1, pop a stitch marker into the ch 1.
Put 1 htr into the next 18 (ish!) stitches (or until you are just under half way around the circle).
Ss into the next 4 stitches. Put 1 htr into the remaining stitches until you are 2 stitches away from the stitch marker. Ss into the final 2 stitches, and ss into the stitch with the stitch marker in.
Cut and fasten off. Sew in your loose ends. Sew up the hole in the middle.
For the stalk:
In brown, ch 8 and put 1 dc into the 2nd ch from the hook, and put 1 dc into each of the chains until you get to the end. Cut and fasten off. Sew in half on to the pumpkin.
For the leaf:
In green, ch 6. Put 1 dc into the 2nd ch from the hook, 1 htr into the 3rd ch, 1 tr into the 4th ch, 1 htr into the 5th ch and 1 so into the final chain. Cut and fasten off. Sew onto the pumpkin.
Crochet Pumpkin Mug Cosy
I used chunky yarn scraps for the mug cosy and the pumpkin (and a 5mm hook). I used DK yarn for the stalk (and a 3.5mm hook).
For the mug cosy part: Start with a slip knot and ch a number which is just a bit smaller than the height of your mug (for me this was a ch of 10).
Put 1 dc in the 2nd ch from the hook, and continue with 1 dc in each ch until you reach the end.
*Ch 1, turn. Put 1 dc in each stitch until you reach the end of the row.
Repeat from * to end until your mug cosy fits around your mug.
Crochet all the way around the edge of your mug BUT stop before you get to the final side….we’re going to add some button holes / loops here.
Starting in the first corner of the final side, ch 7. Skip a stitch and ss into the next stitch. Ss down the final edge of the mug cosy until you have 2 stitches left. Ch 7 again, skip a stitch and ss into the final stitch. Cut and fasten off. Sew in your loose ends.
Sew two buttons on the opposite side to the loops.
? For the pumpkin: Start with a slip knot and ch 5. Join with a ss into the furthest ch from the hook to make a circle.
Ch 1, pop a stitch marker into the ch 1 and put 10 htr into the circle. Join to the stitch after the stitch marker with a ss.
Ch 1, pop a stitch marker into the ch 1 and put 2 htr in each stitch all the way around. Join to the stitch after the stitch marker with a ss.
Ch 1, pop a stitch marker into the ch 1.
Put 1 dc into the next 7 (ish!) stitches (or until you are just under half way around the circle).
Ss into the next 3 stitches. Put 1 dc into the remaining stitches until you are 2 stitches away from the stitch marker. Ss into the final stitches, and ss into the stitch with the stitch marker in.
Cut and fasten off. Sew in your loose ends. Sew up the hole in the middle.
For the stalk:
In brown, ch 4 and put 1 dc into the 2nd ch from the hook, and put 1 dc into each of the chains until you get to the end. Cut and fasten off. Sew on to the pumpkin.
Glue or sew your pumpkin onto the mug cosy.
Crochet Pumpkin Garland
If you’re looking for a slightly longer stash busting project, I have a FREE pattern on my website for a Crocheted Pumpkin Garland – click HERE to grab your copy!
Are you feeling inspired to dive into these quick and easy autumn crochet projects?! Whether you’re making them for yourself or as gifts, these projects are sure to bring some cosy, autumn vibes to your home or craft space.
Fancy more crochet inspiration, pattern chats and sneak peeks? Come and join my lovely Facebook group – it’s full of friendly crocheters just like you!
So, grab your yarn, put on your favourite autumn playlist, and enjoy some relaxing crochet time – happy crocheting!
Click HERE for my Autumn Baskets Crochet KIt!