
If you’ve ever made crochet squares or little appliqués and found them going all curly (especially when you try to attach them to wreaths or other projects), don’t worry – you’re not doing anything wrong! That’s just the nature of crochet. The good news is that there’s a really easy fix: blocking.
Blocking helps your crochet pieces hold their shape, look neat and professional, and makes them much easier to join onto bigger projects. In this post, I’ll show you how to block crochet squares and appliqués with water and pins – the super simple beginner-friendly way I use myself. I’ve recently blocked my mini neckerchief scarf and it’s a complete game changer!
What is Blocking in Crochet?
Blocking is the process of shaping and setting your crochet pieces so they lie flat and keep their intended size and shape. You’ll often hear about blocking big projects like shawls or garments, but it’s just as useful for small crochet motifs, appliqués, and granny squares.
Think of it as giving your crochet a bit of a spa day – a soak, a stretch, and a rest!
Why Block Crochet Squares and Appliqués?
If you skip blocking, you’ll probably notice:
- Curly or wavy edges on your squares
- Appliqués that don’t sit flat on your wreaths, blankets or bags
- Uneven shapes that don’t line up when joined
Blocking sorts all of that out. It evens out your stitches, highlights the shape you’ve made, and makes attaching them to your project a breeze.
What You’ll Need for Wet Blocking Crochet
You don’t need anything fancy — here’s what I use:
- Foam blocking mats (the kind kids play on work fine!)
- T-pins (make sure they’re rust-proof)
- Spray bottle (I just washed out an old hair product bottle)
- A towel (optional, to protect your surface)
Step-by-Step: How to Block Crochet Squares & Appliqués
1. Prepare Your Crochet Piece
Finish your square or appliqué as normal. Weave in the ends if you want (they’ll set nicely in place after blocking).
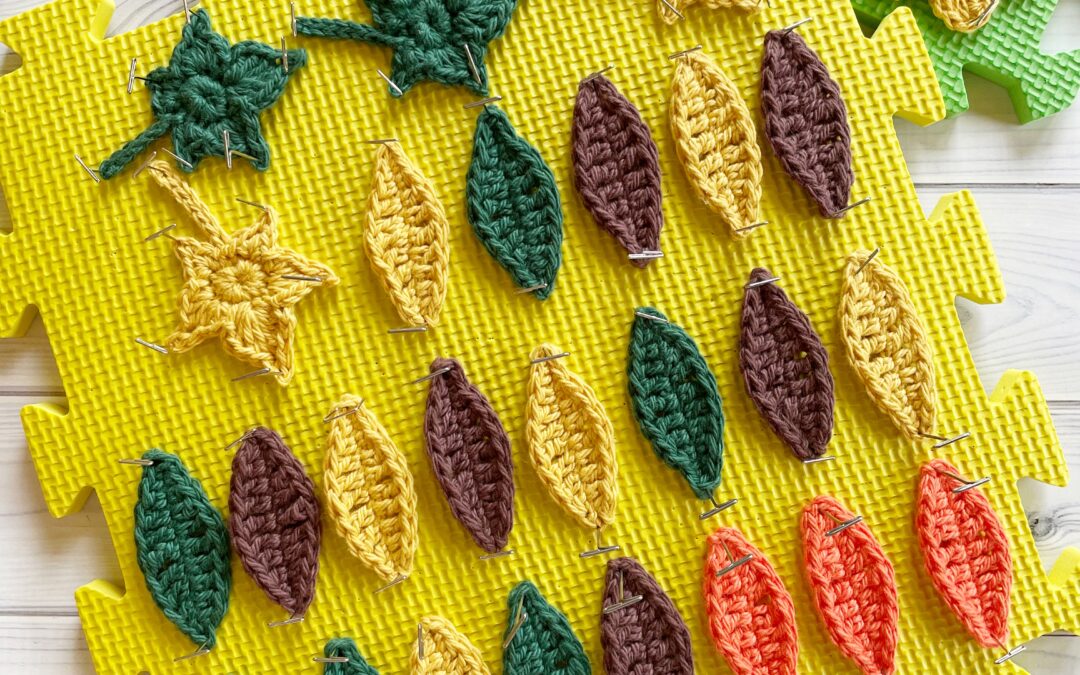
2. Pin into Place
Lay your crochet piece on a foam blocking mat. Using your T-pins, pin the corners and edges into place, stretching gently until it forms the neat shape you want. Don’t overstretch – it’s about evening things out, not tugging it into something else entirely!
3. Spray with Water
Fill your spray bottle with clean water and mist your crochet until it’s damp all over. You don’t need to soak it – just a good, even spray.
4. Leave to Dry
Now the hard bit: waiting! Leave your pinned pieces to dry completely. Depending on the yarn and room temperature, this can take a couple of days.
5. Unpin and Admire
Once dry, carefully remove the pins and you’ll be left with neat, flat, beautifully shaped crochet squares or appliqués.
Hey presto – ready to attach to your wreath, blanket, or whatever project you’re working on!
Blocking Crochet Tips for Beginners
Blocking might sound like an extra step, but it makes a huge difference; especially for crochet squares and appliqués that need to sit flat. Always use rust-proof pins so you don’t end up with brown marks, and be patient with drying time so your pieces hold their shape. Work on a surface that can handle a little water, and remember that acrylic yarn won’t block as firmly as natural fibres, though it still helps with curly edges. Once you’ve tried wet blocking with pins, you’ll see how much neater and easier your projects are to join…and you’ll never look back!