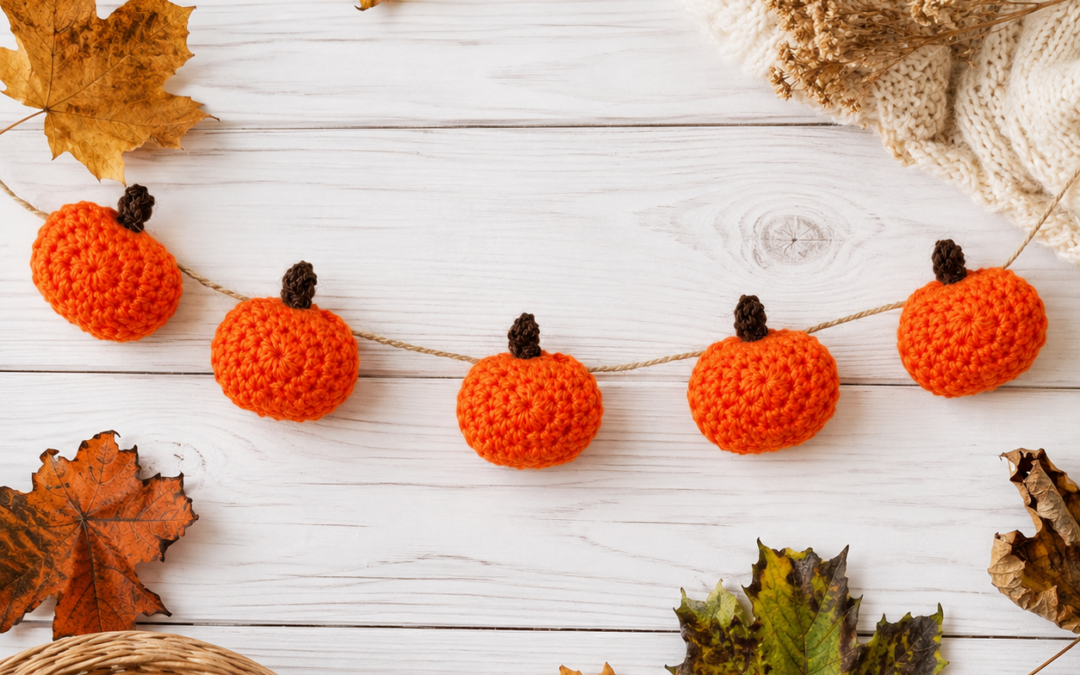
If you’re looking for a quick and easy autumn crochet project, these mini crochet pumpkins are just the thing. They’re fun to make, use very little yarn and are perfect for adding a cosy handmade touch to your home during autumn.
I’ve turned mine into a pumpkin garland, but they’re incredibly versatile. String them together to hang across a mantelpiece, weave them through fairy lights, decorate an autumn wreath or simply pop a few into a bowl as seasonal decorations. They also make lovely handmade gifts for fellow pumpkin lovers!
The pattern is suitable for anyone who has crocheted before and includes simple step-by-step instructions. If you’re looking for a relaxing stash-busting project, you’ll have a whole collection of pumpkins before you know it.
What You’ll Need To Crochet Mini Pumpkins
To crochet your mini pumpkins you’ll need:
- 3.5mm crochet hook
- Orange DK yarn
- Brown DK yarn
- Scissors
- Darning needle
These little pumpkins are a brilliant way to use up leftover yarn, so don’t worry if you only have small amounts in your stash.
Mini Pumpkins Crochet Pattern
Start with a slip knot and ch 5. Join with a ss into the furthest ch from the hook to make a circle.
Ch 1, pop a stitch marker into the ch 1 and put 10 htr into the circle. Join to the stitch after the stitch marker with a ss.
Ch 1, pop a stitch marker into the ch 1 and put 1 htr into the same place as the ss. Put 2 htr in the next stitch and continue with 2 htr in each stitch all the way around. Join to the stitch after the stitch marker with a ss.
Ch 1, pop a stitch marker into the ch 1 and put 1 htr into the same place as the ss. Put 2 htr in the next stitch and 1 htr in the next. Repeat 2 htr, 1 htr all the way around. Join to the stitch after the stitch marker with a ss.
Put a ss into the next stitch, and put a ss into the next stitch.
Pop a stitch marker into the first ss that you did.
Put 1 htr into the next 12 stitches (or until you are just under half way around the circle).
Ss into the next FOUR stitches. Put 1 htr into the remaining stitches until you are 2 stitches away from the stitch marker. Ss into the final 2 stitches, and ss into the stitch with the stitch marker in.
Cut and fasten off. Sew in your loose ends. Sew up the hole in the middle.
This is one half of the pumpkin. Now make another one!
For the stalk:
In brown, ch 8 and put 1 dc into the 2nd ch from the hook, and put 1 dc into each of the chains until you get to the end. Ch 1, turn. Put 1 dc into each stitch until the end.
Joining the pumpkin together
Place both sides together and start by joining with 1 dc into the stitches where the htr’s are (not into where you have slip stitched).
Continue with 1 dc in each pair of stitches to join until you get to the bottom where the slip stitches are. Ss into the stitches where the ss are. Continue with 1 dc in each pair of stitches until the htr stitches run out and you’re left with the ss from the previous round.
Add a little stuffing to your pumpkin. Ss across the top of your pumpkin to join. Sew in your loose ends.
Fold the brown stalk in half and sew it onto the top of your pumpkin.
Add some jute string if you’d like to hang your pumpkin up or made loads and thread them together to make a garland.
I hope you enjoy making these mini crochet pumpkins as much as I do. They’re one of those lovely projects that work up quickly and instantly make your home feel ready for autumn.
Click here to download a PDF version with pictures and stitch videos.